Since my last posting about Topo Surfaces and looking at water and flooding, we seem to be having more lengthy discussions with the Environmental Agency these days with regards to flooding in conjunction with global warming and climate change.
The Environmental Agency provide us with maps showing the 1 in 200 year Tidal Events + 2070 Climate Change Prediction Depth Grid Maps centred on our site.
One assumes that they obtain levels from the OS Maps and or aerial photographs to build such models. Using Revit we are able to model the Existing and Proposed sites and show them more accurately the flood pattern for different levels of water.
We can also provide them with volumes of water held on the site.
The client can see to what extent his building is at risk from flooding.
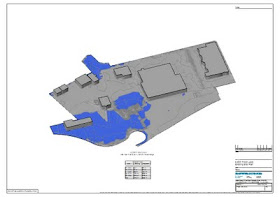
Existing Site Layout 6.20m Flood Level.
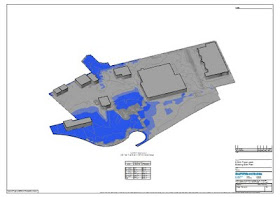
Existing Site Layout 6.30m Flood Level.
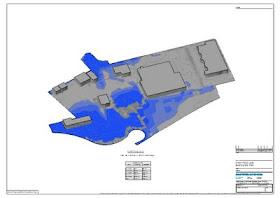 Existing Site Layout 6.40m Flood Level.
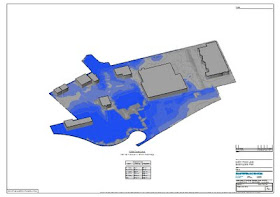 Existing Site Layout 6.50m Flood Level.
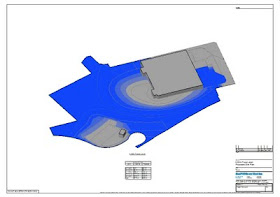 Proposed Site Layout 6.5m Flood Level
Credit goes to Rikki Hartigan who created these models from AutoCAD 2D Drawings.
.
 Existing Site Layout 6.40m Flood Level.
 Existing Site Layout 6.50m Flood Level.
 Proposed Site Layout 6.5m Flood Level
Credit goes to Rikki Hartigan who created these models from AutoCAD 2D Drawings.
.
Great Idea!
ReplyDeleteWhat a clever idea.
ReplyDeletethanks for posting it.
cheers,
William
that's cool. Just using topo surfaces or mass objects for water?
ReplyDeleteThe Site layout is set as existing and the water is a Topo with levels all being set to the same value. The Water is set to New or Proposed and we set the colour to blue and made it transparent so that a number of layers under one another made the deeper water more blue.
ReplyDeleteHi Cadalot,
ReplyDeleteFantastic tip, thank you very much.
I've one question though...in order to indicate the different depths of water did you copy the water topo a few times or how did you create these layers?
Regards,
Stephan
We set the colour of the flat water topos to blue and made them transparent so that a number of layers under one another made the deeper water more blue.
ReplyDeleteSee link for an animation that was made just by hiding the layers one at a time and reversing the order in an animated gif file
http://www.swh.co.uk/news_detail.php?news_id=19